Repair USB C Cable (with USB C host) - long plug
Crap. Your recable has a broken cable? Sure, that's annoying at first - but it's not a big problem! Because recable is a repairable charging cable. With a few simple steps (and a few simple tools) you can easily repair it yourself.
Why is this a good idea? By repairing your charging cable, you are doing something good for the planet. Because you avoid electrical waste and conserve resources. You also don't need to buy a new cable and save money. A win-win situation for you and the environment!
USB C to USB C Cable - Which plug do you have?
We use a longer and a shorter plug for our USB C to USB C cables. Compare your connector with the illustration. These instructions are for the longer connector.
Do you have the short connector? Click here for the instructions with the short connector.

Ready? - Then let's get started!
Difficulty: medium
Time required: approx. 30 min
What you need

- Side cutters
- Combination pliers
- Soldering iron
- Solder
- Cutter knife
- Lighter
- heat shrink tube
(We use a shrinkage ratio of 3:1 with an initial diameter of 9.5 mm. Can be found here ).
Tip: If you are missing one of the tools, you don't have to buy a new one. Instead, borrow it from neighbours, friends or your family. Maybe there is a repair café near you that can help you.
Let's go!
Step 1

- Unplug recable from the power supply, disconnect the power supply.
- Carefully cut the heat shrink tube lengthwise with the cutter-knife.
- Peel the heat shrink tube from the connector housing with your fingers.
Step 2

- Use the cutter-knife to bend open both clips of the strain relief.
Step 3
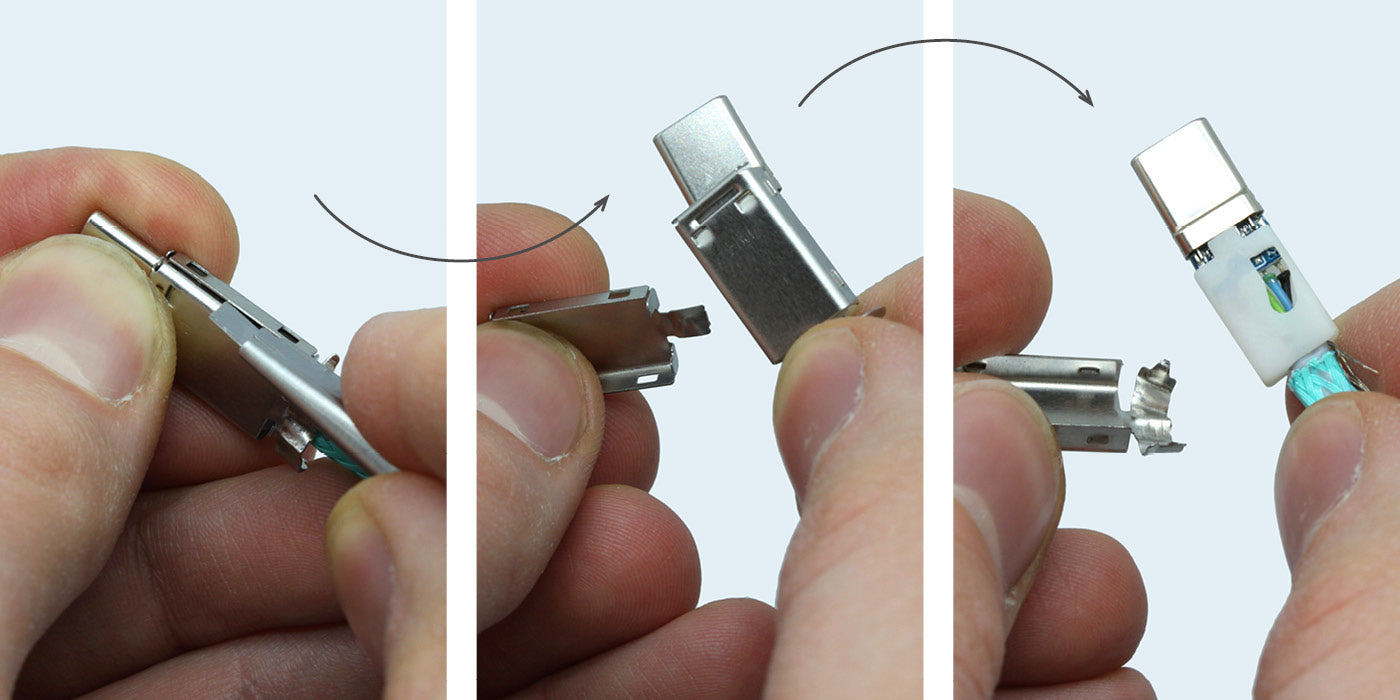
- Carefully pry up the catches between the housing halves with the cutter.
- Take off both halves of the casing.
Step 4

- Carefully stretch the insert open with your fingers and pull it off the side of the plug.
Step 5

- Heat a soldering contact with the soldering iron until the solder melts.
- Move the connector so that the stranded wire is released from the solder pad. Do not pull too hard on the solder pads!
- Repeat the process for all five connections. A "third hand" can make your work easier.
Step 6

- Cleanly cut off the damaged area on the cable with the side cutter.
- Use the side cutters to free the cable to approx. 1.5 cm from braided sleeve.
- Carefully fuse the ends of the braided hose together with the lighter.
- For the natural fibre braided sleeves, you may need to use a strip of Washitape to secure the braided sleeve against unravelling.
Step 7

- Expose the strands over a length of 12 mm.
- Carefully cut the sheath of the cable all around with the cutter (not too deep!) and pull it off with your fingers.
Step 8

- The cable has a PET core. Shorten it with the side cutter.
- Score the insulation of the stranded wire 3 mm behind the end. Pull off the insulation with your fingers.
- Repeat this step for all five strands.
Step 9

- Soak the stranded wire with solder by heating it with the soldering iron and adding the solder. Clean your soldering tip in between, e.g. with a wet piece of kitchen roll.
- Repeat the step for all five strands.
Step 10

- Sort the strands by colour in the following order:
red (power supply)
white (data-)
green (data+)
blue (cc)
black (GND) - Join the stranded wire and the matching solder pad. Fuse the two together with the soldering iron.
- Repeat the step for all five strands.
Step 11

- Stretch the insert a little and slide it over the board and strands.
- Make sure that the nose of the insert is exactly behind the plug, the insert lies loosely over the cables and that the shielding's hatchet strand is sticking out to the side.
- Smooth out the braided sleeve on the cable, right up to the insert.
Step 12

- Reassemble the housing halves around the connector.
- Press them together so that the lugs come together again.
- Make sure that the shielding's filler wire is in the strain relief.
Step 13

- Press the clamps of the strain relief firmly with the Combination pliers .
- Make sure that the axe strand is clamped in the strain relief.
Step 14
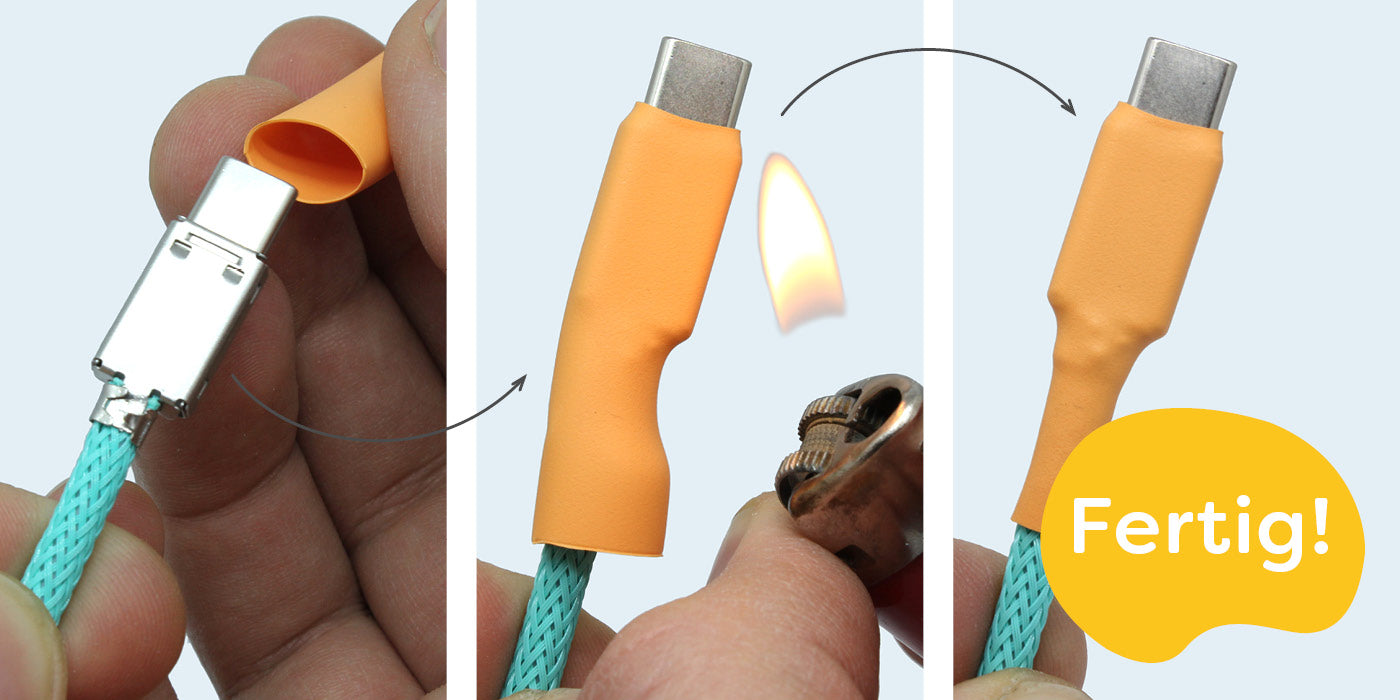
- Slip the heat shrink tube over the USB-C plug and shrink it with the lighter.
- Do not get too close with the flame. The heat shrink tube will otherwise become sooty. To avoid this, you can also use a heat gun instead of a lighter.
You did it!
By repairing your recable, you have made a small but important contribution to environmental protection. That's great!
Where to put the rubbish?

If something should have broken during the repair, you can find spare parts here.